Advanced
Alternate Receiver
The default bridge mode sends funds to the same address across chains, as the same algorithm is used to derive an address from a private key across the chains where the OmniBridge is deployed. However, it is easy to specify another address to receive funds on the chain you are bridging to. This may be desirable when sending funds from a multi-sig wallet (like Gnosis Safe), or as a transfer method to another address on a secondary chain.
Set and Alternate Receiver
- Click on the "Advanced" link on the Omnibridge UI. A text field will appear.
- Paste the
0x...address you are transferring funds to on the receiving chain. - Proceed with the Request
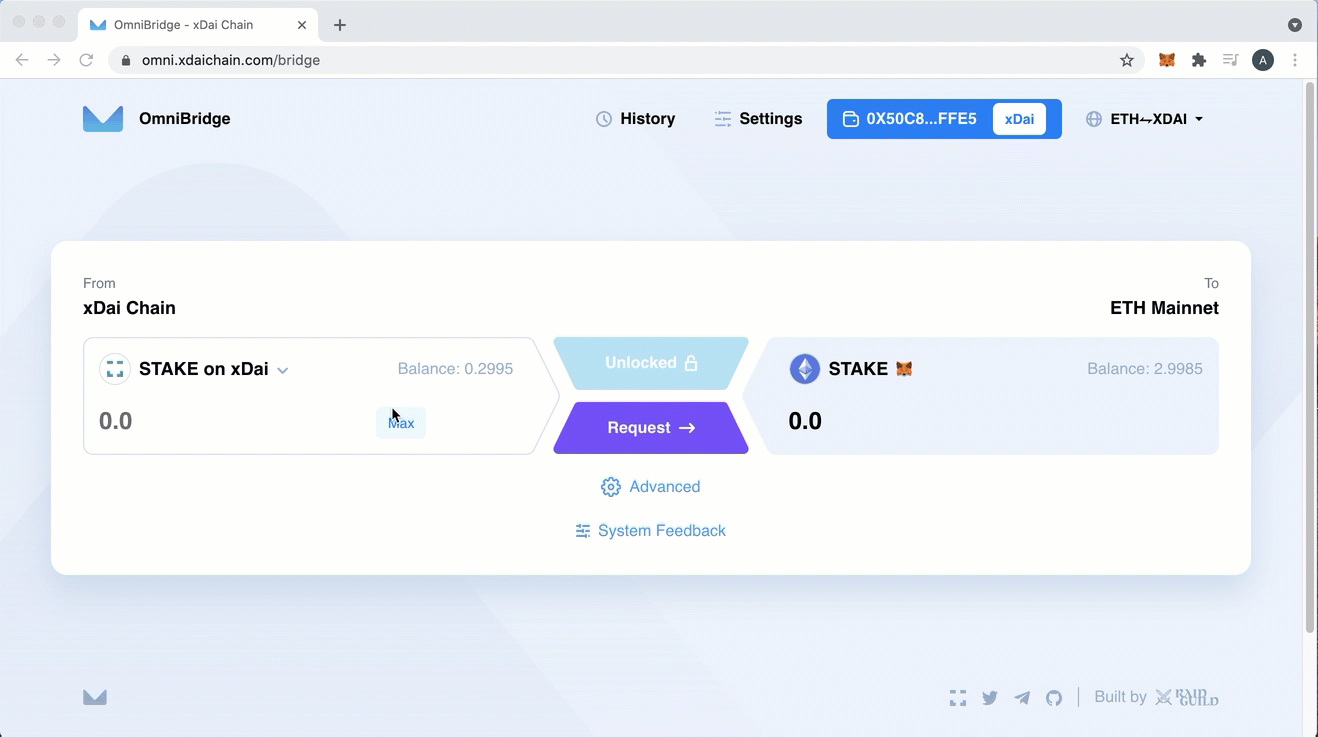
Claims on the receiving chain can be completed using any address with enough funds. Copy the tx hash from the first transaction (it will be linked during tx processing or when complete in the history tab of the bridge. You can also find in your MetaMask wallet) and paste into https://alm-bridge-monitor.gnosischain.com/ to search and execute.
Set Custom RPC Endpoints
If you are experiencing an issue with an Ethereum or Gnosis Chain RPC endpoint when trying to bridge you can easily set your own endpoint in the interface. Note that these are Read Only, if you need to use the RPCs to process transactions, you can set custom RPCs in your web3 wallet like MetaMask as well.
RPC Endpoints:
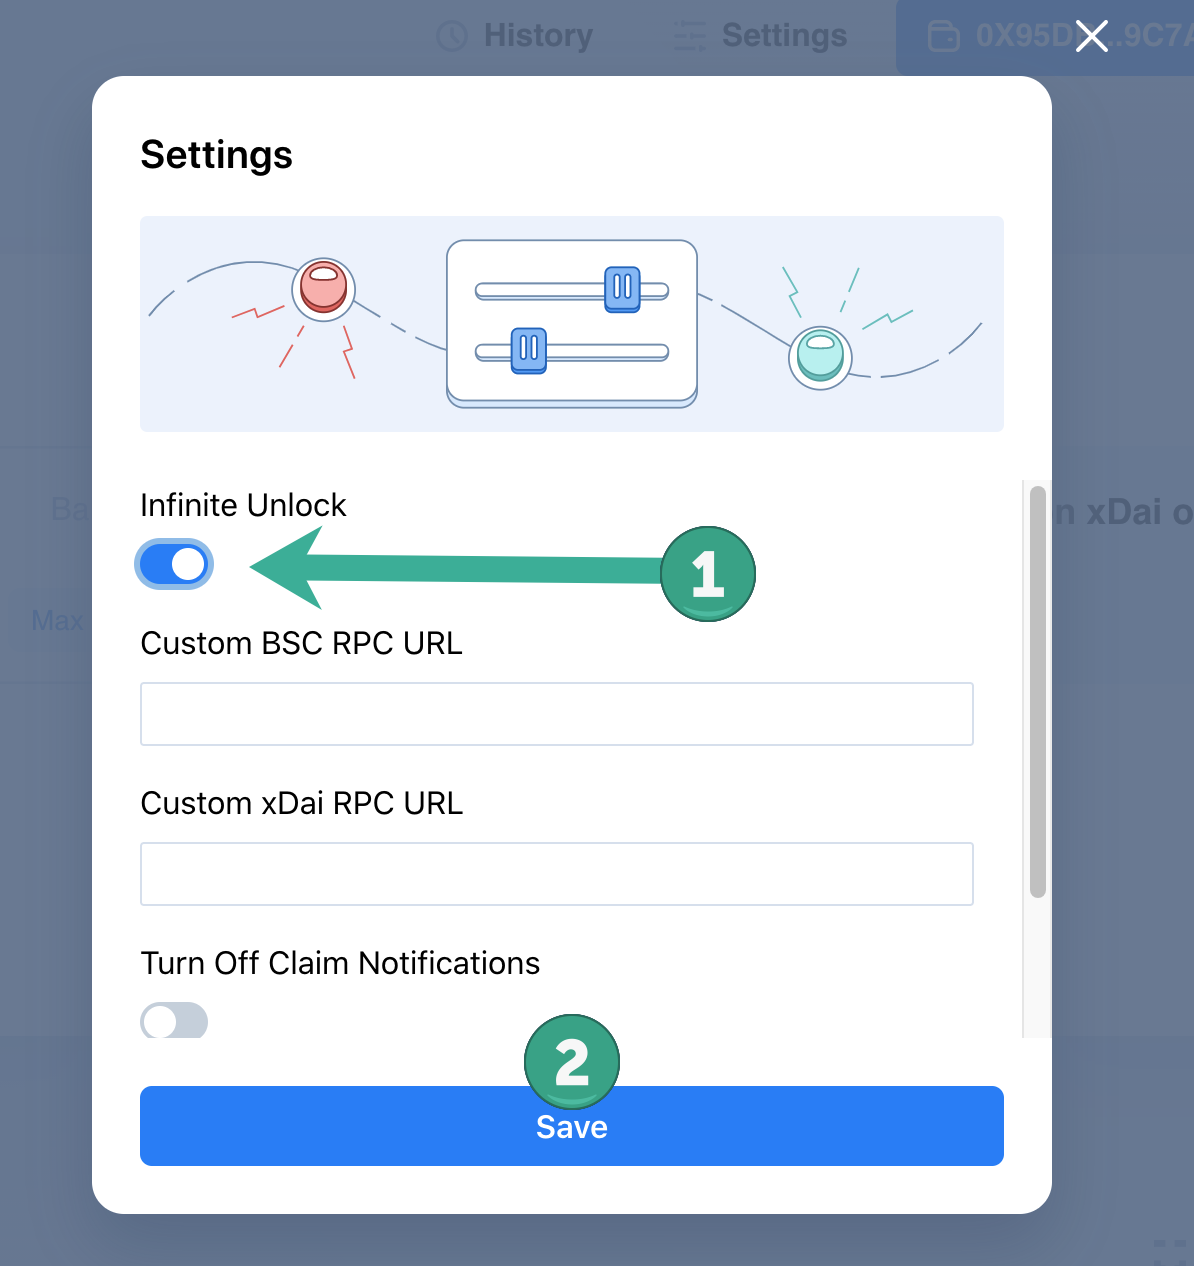
- Go to the bridge UI and click settings at the top.
- Add your RPC of choice and click Save. Note that the URL options change based off which networks you have selected to bridge between.

Infinite Unlock
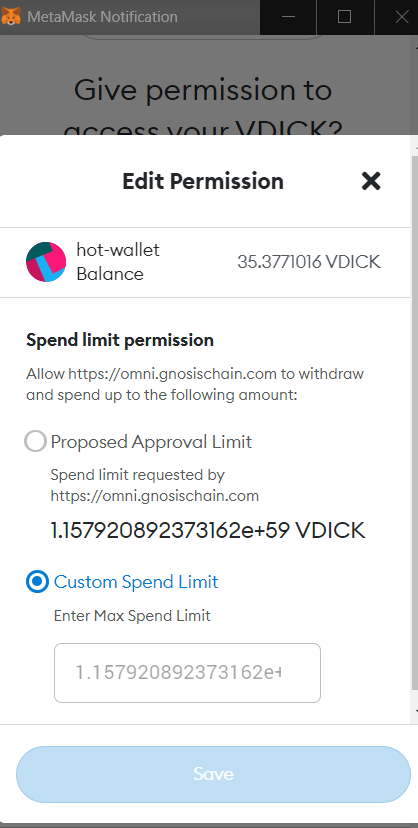
You must give approval to the bridge contracts to access and send ERC-20 tokens. This is similar to Uniswap or another DEX that asks for approval to spend your tokens. You can give this permission on a per transaction basis, or you can unlock an unlimited amount to transfer with the infinite unlock option. Infinite unlock saves on transaction fees, but does introduce security risk if the contract is compromised. If compromised, a malicious 3rd party may have the ability to access all funds rather than a finite approved amount.
Set Infinite Unlock
- Go to Settings on the top of the page
- Toggle "Infinite Unlock" and click Save. When you process your next unlock, the transaction will allow all transfers of that token without needing to unlock again.
- If you don't wish to use infinite unlock but would like te instead set a custom limit, when the MetaMask window pops up to ask for approval you have the option to set a spend limit. Click "Edit Permission" and it will take you to the following screen: